Navigation: [Customer] >Products >Manage Products
With a customer selected, the Manage Products menu contains three primary sections: (1) Manage Products, (2) Provider Insights, and (3) Products.
This article provides a high-level overview of the Manage Products screen and features.

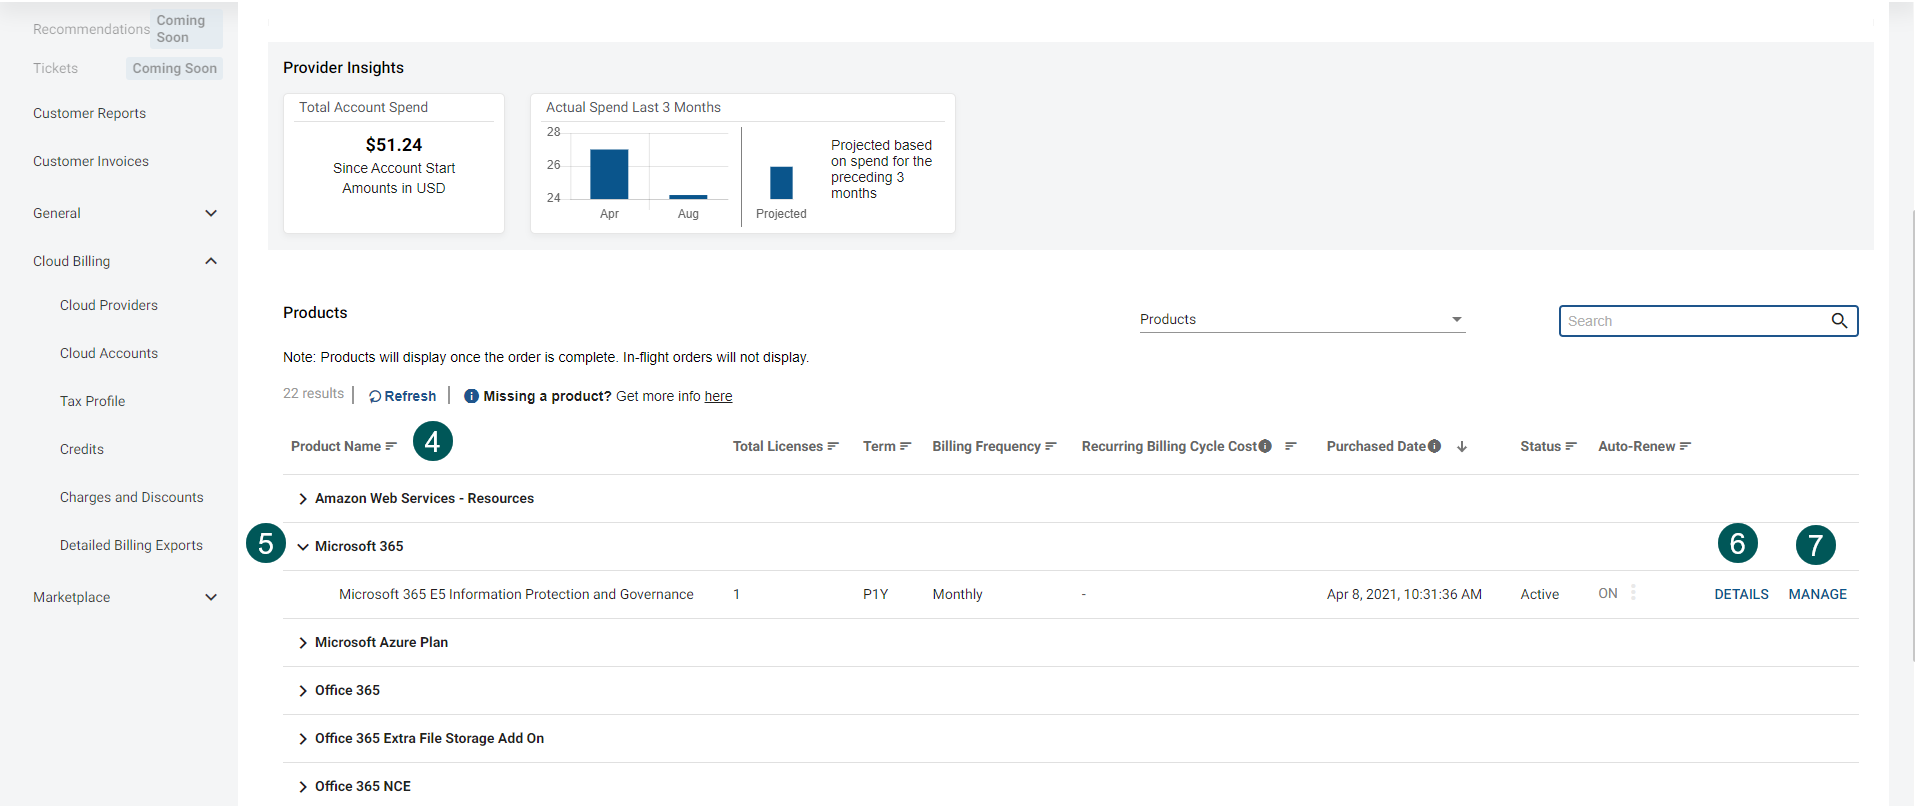
(1) The Manage Products section tiles represent the cloud vendor products purchased under the customer profile.
(2) Provider Insights is a snapshot of the transaction volume
(3) The Buy Products button allows you to quickly navigate to the purchase process within the platform
(4) The Products table lists current and prior orders placed. You can sort and filter.
(5) Click the > next to a Product Name to see details of an order and access the manage feature
(6) Click on Details to view order information such as subscription information including term
(7) Click on Manage to perform life-cycle management and other actions related to the product purchases. The options can vary based on the cloud vendor
Details (on a Subscription)

(8) Subscription Details includes data specific to the order
(9) Subscription Term displays Start Date and Commitment End Date
(10) Subscription Updates tracks the lifecycle changes made to the subscription since the Start Date
Manage (a Subscription)
The options available under Manage vary by cloud vendor. For this illustration, we look at a Microsoft Subscription.
Modify Subscription

(11) Modify the number of licenses
(12) Change the status of a subscription order
(13) Enter the End Customer PO Number (available as a report display option )
(14) Enter your PO reference (available as a report display option)
Users and Licenses
From the User and License dialog window you can Create or Assign licenses to a user.

(15) Create New User that automatically syncs with the tenant
(16) Assign available licenses or change previously assigned licenses (see screenshot below)
(17) The Create New User screen indicates required fields by the "*" symbol
(18) Pick an option under Assign Role for the new user

(19) Change the permissions for the selected user
(20) The Assign Licenses section allows you change and add license options for the user based on licenses available
(21) Confirm and Assign the changes
Manage Renewal
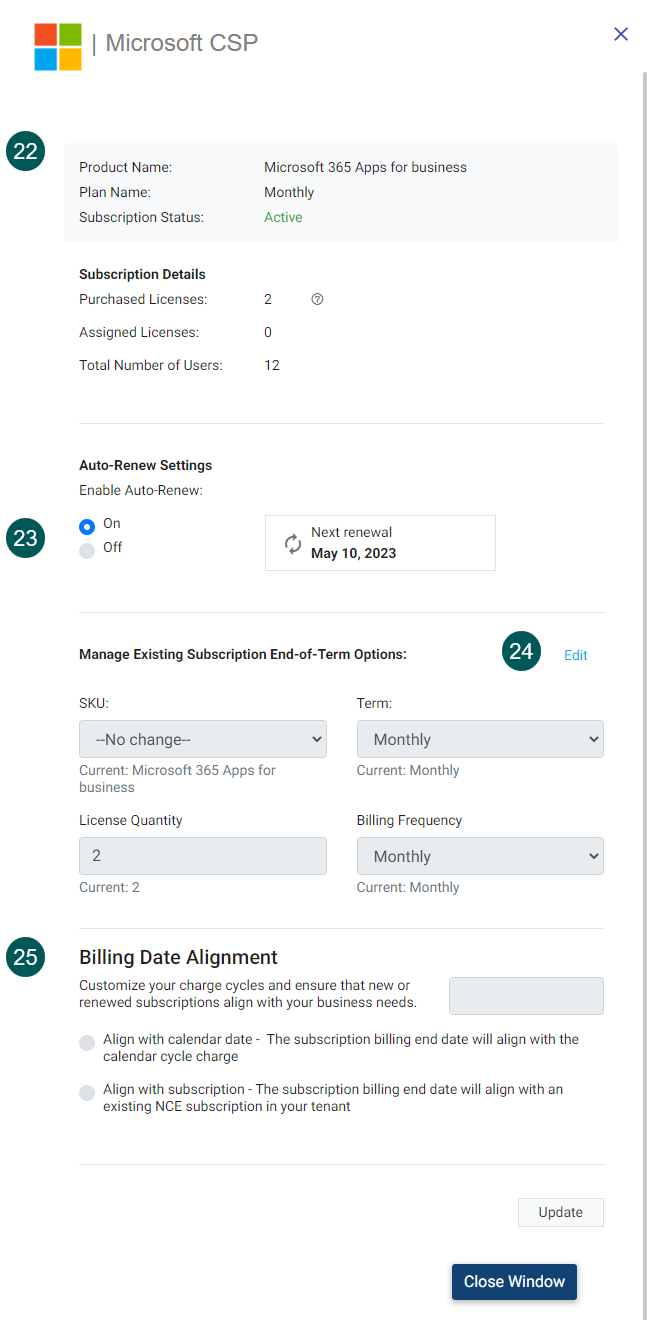
(22) Top portion of the screen displays summary information related to the subscription
(23) Manage auto-renewal at the subscription level
(24) Click Edit to activate the renewal feature options
(25) Set the conditions of the renew using the options under Billing Date Alignment
Upgrade
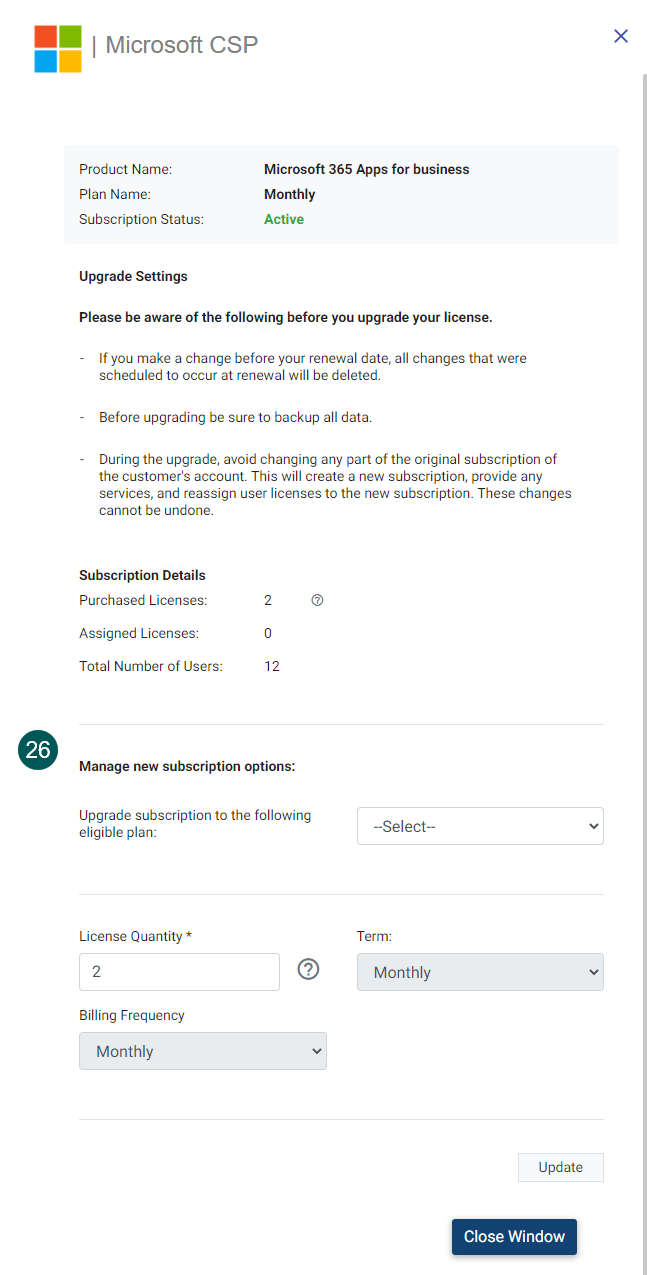
(26) Available upgrades display in the -Select- drop-down list
Pause
This screen display the message related to pausing a subscription.

Cancel
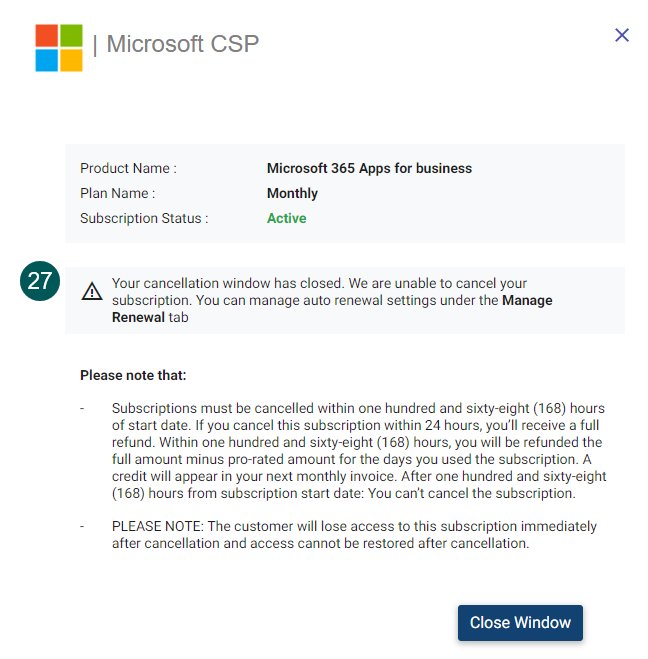
(27) This screen may display the option allowing you to cancel but it is subject to cloud vendor cancellation policies. In this example, the subscription has passed the date of cancellation.